Jade Engine is intended to be compiled directly into the target application in Visual Studio 2017 or newer.
In order to make set-up as easy as possible, Visual Studio Property Files are included and the following guide uses git submodule to quickly add Jade Engine into a new project.
Note that the following instructions were created with Visual Studio 2017 and therefore might need to be changed for a different Visual Studio version.
Note that the instructions will be using Git from command line but the steps should be easily translated to your favorite Git client.
Adding Jade Engine to a new project and compiling minimalistic sample
Create Empty Visual Studio project
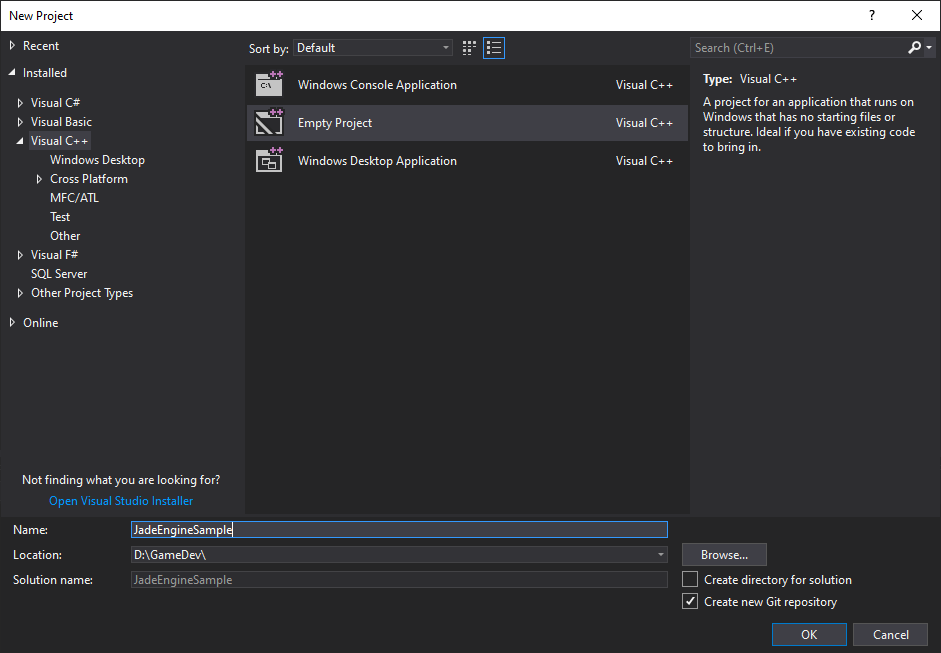
With Visual Studio open, go to File > New > Project... pick Visual C++ > Empty Project, choose project name - in my case JadeEngineSample - and location and check Create new Git repository (alternatively you can do git init yourself).
Add Jade Engine as git submodule
Open the chosen location in Git and type following:

Add Jade Engine header and source files to the project
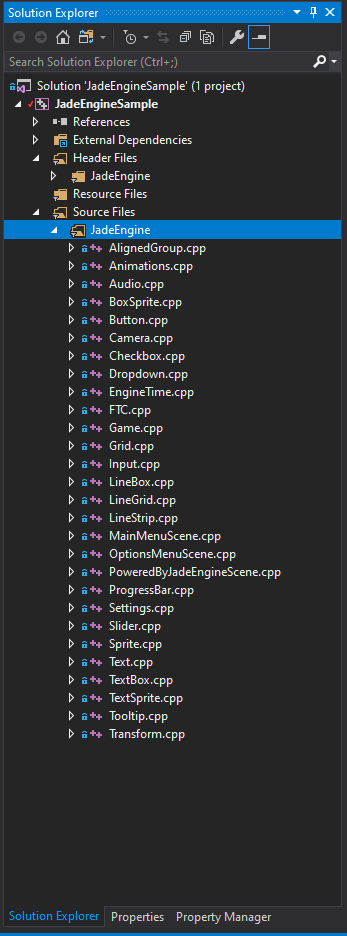
Next, back in Visual Studio, we will add the Jade Engine source files and headers to our project. We recommend creating a filter for Jade Engine files but that step is optional.
In Solution Explorer (if you don't see this window go to View > Solution Explorer) right click on Header Files filter, select Add > New Filter and name it JadeEngine. Right click on the newly created filter and select Add > Existing Item..., navigate to jade-engine\include, select all files (Ctrl+A) and click Add.
Repeat similar process for source files: In Solution Explorer right click on Source Files filter, select Add > New Filter and name it JadeEngine. Right click on the newly created filter and select Add > Existing Item..., navigate to jade-engine\source, select all files (Ctrl+A) and click Add.
Add Jade Engine property files to the project
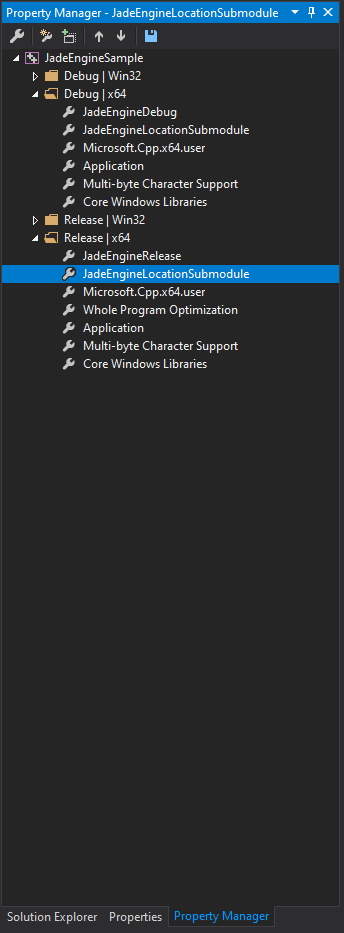
In Property Manager (if you don't see this window go to View > Other Windows > Property Manager) navigate to JadeEngineSample > Debug | x64, right click and select Add Existing Property Sheet.... Locate jade-engine\JadeEngineLocationSubmodule.props and click Open. Repeat the same process for jade-engine\JadeEngineDebug.props.
In Property Manager navigate to JadeEngineSample > Release | x64 and repeat the above process for jade-engine\JadeEngineLocationSubmodule.props followed by jade-engine\adeEngineRelease.props.
Add main.cpp and initialize Jade Engine
Switch Solution Platform to x64 as Jade Engine is only intended to compile in x64 configuration.
Back in Solution Explorer right click on Source Files filter, select Add > New Item..., name it main.cpp and click Add.
Here is a bare-bones example of a main.cpp that initializes Jade Engine.
For more mature examples of main.cpp see jade-engine\samples\JadeEngineSamples.sln solution.
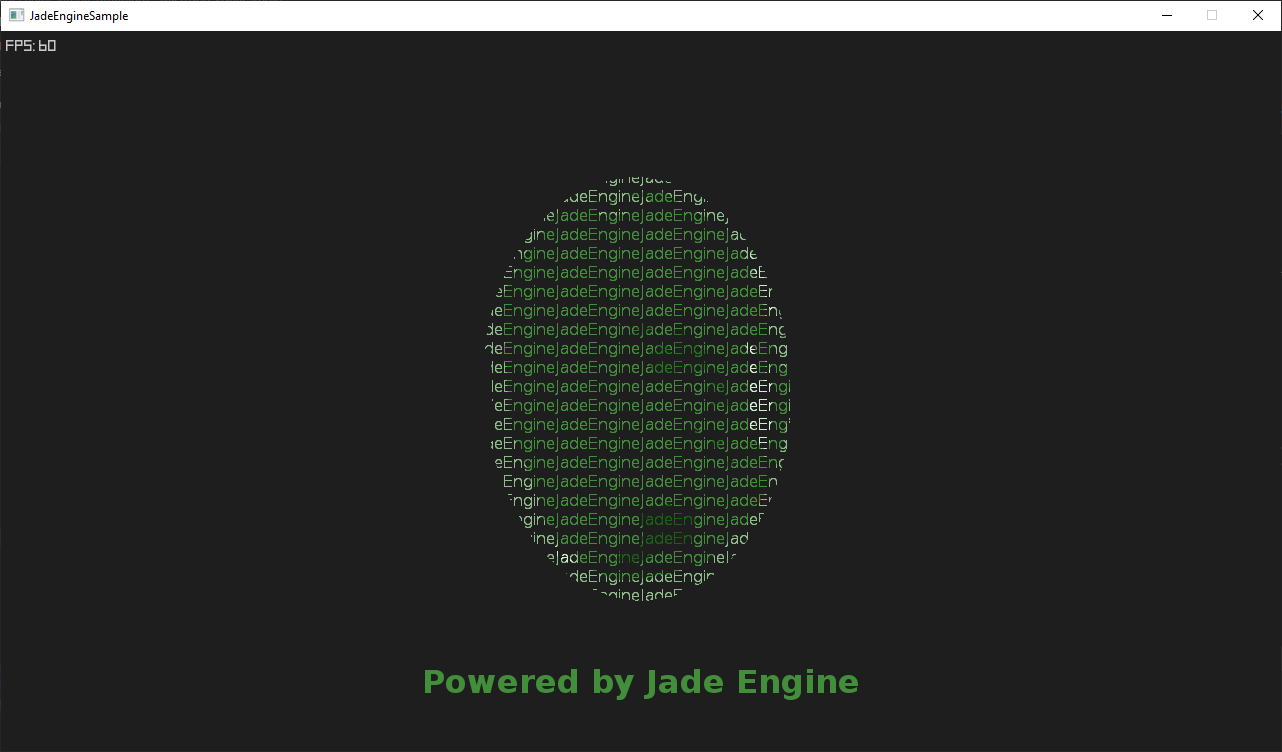
Build the project (Build > Build Solution or F7) and run it (Debug > Start Debugging or F5).